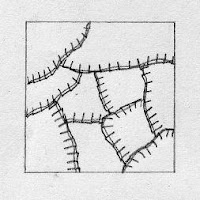
In crazy patchwork, scraps of fabric are stitched onto a foundation fabric. You might wonder why, if you already have a perfectly good piece of fabric, you'd want to sew more bits of fabric all over it. Well for one thing, you don't have to use a perfectly good piece of fabric for the foundation. You could use a worn sheet that is getting too thin for further use, or you could use an old tablecloth that is stained beyond redemption. For another thing, by adding more layers you make the cloth heavier and more suited for bedding. Also the end result is more decorative than a plain piece of fabric. And finally, it's a lot of fun.
 1. I don't recommend you just start sewing fabric to one end of a bedsheet and keep going until it is all covered. It would be too unwieldy. Better to start by cutting your foundation fabric into smaller squares. How big depends on the size of your scraps. If you have a lot of quite large scraps, choose a large block size, maybe 12" square. If your scraps are all pretty small 6" might be a better size. Well, personally, I would use 6.5" squares, so when I sew them back together with a 1/4" seam allowance, the finished squares are 6" exactly.
 2. Pin a scrap of fabric on the foundation square, with the right side up.
 3. Pin another scrap of fabric right side up, slightly overlapping the first.
 4. Now stitch through all three layers of fabric using a decorative stitch that covers the raw edge. Don't panic! This isn't as hard as it sounds. Use a thicker thread than regular sewing cotton - embroidery thread is good and it looks nice. Avoid metallic threads unless you're already experienced at using them, as they can be hard to work with. The simplest decorative stitch is buttonhole stitch. You'll quickly get good at this. If you want to advance to herringbone stitch, or chain stitch, or even more exotic stitches, be my guest. But if you stick to buttonhole stitch you'll still have a beautiful patchwork.
 5. Pin on a third patch, overlapping the first two, and stitch all three layers at the join. Keep adding patches until your foundation square is covered. Remove the pins. Trim off any parts of patches that overlap the edges of the foundation square.
6. Keep making squares until you have as many as you want. Sew them together, either by hand or with a sewing machine.
7. That's it. As promised, I will soon show you how to make your patchwork items into a quilt. As crazy patchwork is heavier than English patchwork, you could hem the edges and use it as a summer bedcovering without quilting it. Or you could use it as a decorative tablecloth, make it into clothes or curtains or anything else.
The Victorians used this technique to use up every single scrap of expensive velvet and brocade fabrics left over from dresmaking. They made some absolutely stunning quilts.
This is Part 2 of a 3-part series. Part 1 is How to Make Patchwork and Part 3 is How to Make a Quilt.
2 comments:
I love it! These are great instructions and great links to the stitch descriptions. I feel brave enough to give it a try!
I have a crazy quilt as well, I'll have to get the photos posted on my craft blog.
Post a Comment